texturing

Zbrush displacement in Clarisse by Xuan Prada

This is a very quick guide to set-up Zbrush displacements in Clarisse.
As usually, the most important thing is to extract the displacement map from Zbrush correctly. To do so just check my previous post about this procedure.

Once your displacement maps are exported follow this mini tutorial.

  • In order to keep everything tidy and clean I will put all the stuff related with this tutorial inside a new context called "hand".
  • In this case I imported the base geometry and created a standard shader with a gray color.
  • I'm just using a very simple Image Based Lighting set-up.
  • Then I created a map file and a displacement node. Rename everything to keep it tidy.
  • Select the displacement texture for the hand and set-up the image to raw/linear. (I'm using 32bit .exr files).
  • In the displacement node set the bounding box to something like 1 to start with.
  • Add the displacement map to the front value, leave the value to 1m (which is not actually 1m, its like a global unit), and set the front offset to 0.
  • Finally add the displacement node to the geometry.
  • That's it. Render and you will get a nice displacement.

Render with displacement map.

Render without displacement map.

  • If you are still working with 16 bits displacement maps, remember to set-up the displacement node offset to 0.5 and play with the value until you find the correct behaviour.

Colour Spaces in Mari by Xuan Prada

Mari is the standard tool these days for texturing in VFX facilities. There are so many reasons for it but one of the most important reasons is that Mari is probably the only texturing dedicated software that can handles colour spaces. In a film environment this is a very important feature because working without having control over colour profiles is pretty much like working blind.
That's why Mari and Nuke are the standard tools for texturing. We also include Zbrush as standard tool for texture artist but only for displacement maps stuff where color managment doesn't play a key role.

Right now colour management in Mari is not complete, at least is not as good as Nuke's, where you can control colour spaces for input and output sources. But Mari offers a basic colour management tools really useful for film environments. We have Mari Colour Profiles and OpenColorIO (OCIO).

As texture artists we usually work with Float Linear and 8-bit Gamma sources.

  • I've loaded two different images in Mari. One of them is a Linear .exr and the other one is a Gamma2.2  .tif
  • With the colour management set to none, we can check both images to see the differences between them
  • We'll get same results in Nuke. Consistency is extremely important in a film pipeline.
  • The first way to manage color spaces in Mari is via LUT's. Go to the color space section and choose the LUT of your project, usually provided by the cinematographer. Then change the Display Device and select your calibrated monitor. Change the Input Color Space to Linear or sRGB depending on your source material. Finally change the View Transform to your desired output like Gamma 2.2, Film, etc.
  • The second method and recommended for colour management in Mari is using OCIO files. We can load these kind of files in Mari in the Color Manager window. These files are usually provided by the cinematographer or production company in general. Then just change the Display Device to your calibrated monitor, the Input Color Space to your source material and finally the View Transform to your desired output.

Breaking a character's FACE IN MODO by Xuan Prada

A few years ago I worked on Tim Burton's Dark Shadows at MPC. We created a full CG face for Eva Green's character Angelique.
Angelique had a fight with Johnny Depp's character Barnabas Collins, and her face and upper body gets destroyed during the action.

In that case, all the broken parts where painted by hand as texture masks, and then the FX team generated 3D geometry and simulations based on those maps, using them as guides.

Recently I had to do a similar effect, but in this particular case, the work didn't require hand painting textures for the broken pieces, just random cracks here and there.
I did some research about how to create this quickly and easily, and found out that Modo's shatter command was probably the best way to go.

This is how I achieve the effect in no time.

First of all, let's have a look to Angelique, played by Eva Green.


  • Once in Modo, import the geometry. The only requirement to use this tool is that the geometry has to be closed. You can close the geometry quick and dirty, this is just to create the broken pieces, later on you can remove all the unwanted faces.
  • I already painted texture maps for this character. I have a good UV layout as you can see here. This breaking tool is going to generate additional faces, adding new uv coordinates. But the existing UV's will remain as they are.
  • In the setup tab you will find the Shatter&Command tool.
  • Apply for example uniform type.
  • There are some cool options like number of broken pieces, etc.
  • Modo will create a material for all the interior pieces that are going to be generated. So cool.
  • Here you can see all the broken pieces generated in no time.
  • I'm going to scale down all the pieces in order to create a tiny gap between them. Now I can see them easily.
  • In this particular case (as we did with Angelique) I don't need the interior faces at all. I can easily select all of them using the material that Modo generated automatically.
  • Once selected all the faces just delete them.
  • If I check the UVs, they seem to be perfectly fine. I can see some weird stuff that is caused by the fact that I quickly closed the mesh. But I don't worry at all about, I would never see these faces.
  • I'm going to start again from scratch.
  • The uniform type is very quick to generate, but all the pieces are very similar in scale.
  • In this case I'm going to use the cluster type. It will generate more random pieces, creating nicer results.
  • As you can see, it looks a bit better now.
  • Now I'd like to generate local damage in one of the broken areas. Let's say that a bullet hits the piece and it falls apart.
  • Select the fragment and apply another shatter command. In this case I'm using cluster type.
  • Select all the small pieces and disable the gravity parameter under dynamics tab.
  • Also set the collision set to mesh.
  • I placed an sphere on top of the fragments. Then activated it's rigid body component. With the gravity force activated by default, the sphere will hit the fragments creating a nice effect.
  • Play with the collision options of the fragments to get different results.
  • You can see the simple but effective simulation here.

  • This is a quick clay render showing the broken pieces. You can easily increase the complexity of this effect with little extra cost.
  • This is the generated model, with the original UV mapping with high resolution textures applied in Mari.
  • Works like a charm.

Colorway in VFX - chapter 2 by Xuan Prada

A few days ago I did my first tests in Colorway. My idea is to use Colorway as texturing and look-development tool for VFX projects.

I think it can be a really powerful and artist friendly software to work on different type of assets.
It is also a great tool to present individual assets, because you can do quick and simple post-processing tasks like color correction, lens effects, etc. And of course Colorway allows you to create different variations of the same asset in no time.

With this second test I wanted to create an entire asset for VFX, make different variations and put everything together in a dailies template or similar to showcase the work.

At the end of the day I'm quite happy with the result and workflow combining Modo, Mari and Colorway. I found some limitations but I truly believe that Colorway will fit soon my needs as Texture Painter and Look-Dev Artist.

Transferring textures

One of the limitations that I found as Texture Painter is that Colorway doesn't manage UDIMs yet. I textured this character time ago at home using Mari following VFX standards and of course, I'm using UDIMs, actually something around 50 4k UDIMs.

I had to create a new UV Mapping using the 1001 UDIM only. In order to keep enough texture resolution I divided the asset in different parts. Head, both arms, both legs, pelvis and torso.
Then using the great "transfer" tool in Mari, I baked the high resolution textures based on UDIMs on to the low resolution UVs based on one single UV space. I created one 8k resolution texture for each part of the asset. I'm using only 3 texture channels, Color, Specular and Bump.

Layer Transfer tool in Mari.

All the new textures already baked in to the default UV space 1001

My lighting setup in Modo couldn't be more simple. I'm just using an Equirectangular HDRI map of Beverly Hills. This image is actually shipped with Modo.
Image Based Lighting works great in Modo and is also very easy to mix different IBLs in the same scene. Just works great.

Shading wise is also quite simple. Just one shading layer with Color, Specular and Bump maps connected. I'm using one shader for each part of the asset.

The render takes only around 3 minutes on my tiny MacBook Air.
Rendering for Colorway takes more than that but obviously you will save a lot of time later.
Once in Colorway I can easily play with colours and textures. I created a color texture variation in Mari and now in Colorway I can plug it and see the shading changes in no time.

All the different parts exported from Modo are on the left side toolbar.

On the right side all the lights will be available to play with. In this case I only have the IBL.

All the materials are listed on the right side. It is possible to change color, intensity and diffuse textures. This gives you a huge amount of freedom to create different variations of the same asset.

I really like the possibility of using post-precessing effects like Lens distortion or dispersion. You can have a quick visual feedback of very common lens effects used on VFX projects.

Finally I created a couple of color variations for this asset.

Notes

A couple of things that I noticed while working on this asset:

  • I had one part of the asset with the normals flipped. I didn't realize of this and when rendering for Colorway, Modo crashes. Once inverted the normals of that part, it never crashed again.
  • It would be nice to store looks, or having the option to export looks from one project to another one. Let's say that I'm working only on the upper part of the character, render for Colorway and create some nice looks (including effects like lens distortions, color corrections,etc). It would be great to keep that for the next time that I export the whole character to Colorway.

Colorway for Look-Development in VFX by Xuan Prada

A few days ago (or weeks) The Foundry released their latest cool product called "Colorway", and they did it for free.

Colorway is a product created to help designers with their work flow specially when dealing with color changes, texture updates, lighting, etc. Looks in general.
This software allow us to change those small thing once the render is done. We can do it in real time without waiting long hours for rendering again. We can change different things related with shading and lighting.

This is obviously quite an advantage when we are dealing with clients and they ask us for small changes related with color, saturation, brightness, etc. We don't need to render again anymore, just use Colorway to make those changes live in no time.
Even the clients can change some stuff and send us back a file with their changes.

Great idea, great product.

I'm not a designer, I'm a vfx artist doing mainly textures and look-development, and even if Colorway wasn't designed for vfx, it can be potentially be used in the vfx industry, at least for some tasks.

There are a few things that I'd like to have inside Colorway in order to be a more productive texturing&look-dev tool, but so far it can be used in some ways to create different versions of the same asset.

To test Colorway I used my model of War Machine.

  • Colorway allow us to render an asset using a base shader. Later we can apply different versions of the same textures, or just flat colors.
  • It all begins inside Modo (Cinema4D is on it's way).
  • It's very important how you organize your asset and shaders inside Modo. If you want to have a lot of control in Colorway you will have to split your scene in different parts.
  • In this example, I separated the head in different parts, so I can select them individually later on in Colorway.
  • Even if I'm using the same shader for the whole head, I made different copies so I can tweak them one by one if I want to have even more control in Colorway.
  • In Modo work on the look as you usually do. Once you are happy with the results export to Colorway.
  • In this case I'm using textures to create the look. Maybe you can do it without textures and apply them later in Colorway. You will be able also to remove all the textures in Colorway and start from scratch there. This is a personal taste.
  • Once happy just click on the Colorway button.
  • You can export all the materials and lights used in the scene or only those selected.
  • Click on the render button and that's it.
  • Once the render is done, just open the file exported from Modo and Colorway should pop up.
  • The workspace is super simple and well organized. There are selection groups and looks on the right and shaders, lighting and effects on the left.
  • Just select one of the parts on your left, one of the shaders on your right, or simply select in the viewport.
  • Automatically the controls for the material will pop up.
  • In the material options you can change the textures used by the shaders, or remove them if you want to start with a flat color.
  • I'm changing here the textures for just one of the materials, and later for all of them, creating a new version of my asset.
  • As I said before we can remove all the textures and use only the base shaders plus flat colors in order to create a new version of the asset.
  • Finally the versions that I created for this post :)

A few things that I'd like to see in Colorway in future versions in order to have more control and power for look-dev tasks.

  • Right now we can only change RGB textures. It would be nice to have control over secondary maps. Blending textures with masks would be also great.
  • We can't control the shaders parameters. Having that control for look-dev would be amazing.
  • Support UDIMs has to be a must.
  • Not sure how Colorway manages IBL. If you are using different lights seems to be ok, but if using only IBL it doesn't seem to work totally fine.
  • Transparency, glow and other shading options don't work in the current version.

Texture bleeding in Mari by Xuan Prada

Sometimes Mari seems to have small issues with the texture bleeding.
I just realized that sometimes the bleeding doesn't happen at all. If you find yourself with this problem, the best solution is probably to force Mari to do the texture bleeding.
Only 2 steps are needed.

  • Click on "Toggles on/off whole patch project.
  • Now select the patch or patches, right click on top and select "Bleed patch edges".
  • This should be enough to fix pretty much all the texture bleeding issues inside Mari.

Mari to Modo with just one click by Xuan Prada

UDIM workflow has been around for the last 10 years or so. It became more popular when Mari came out and these days it’s being used by everyone in the vfx industry.

In this blog you can find different ways to setup UDIMs in different software and render engines.
With Modo 801 has never been so easy, fast and great!
With just one click you are ready to go!

  • Export your textures from Mari. I always use the naming “component_UDIM.exr” “RGB_1001.exr”
  • Once in Modo, assign a new shader to your asset.
  • Add a new layer with a texture map, as usual. Add layer -> image map -> load udims.
  • Select the UDIM sequence that you exported from Mari.
  • Change the “effect” to point to the desired shader channel.
  • By default Modo enables the option “use clip udim”. You can check this in the “uv” properties. This means that you don’t need to do anything, Modo will handle the UDIM stuff by itself.
  • That’s it, all done :)
  • As an extra, you can go to the image manager, select one single map and check the UDIM coordinate.
  • Another cool thing, is that you can select all the UDIM sequence in the imagen manager, and change the color space with one single click! This is great if you are working with linear workflow or another color space.

Vector displacement in Modo by Xuan Prada

Another quick entry with my tips&tricks for Modo.
This time I’m going to write about setting up Mudbox’s vector displacements in Modo.

  • Check your displacement in Mudbox and clean your layer stack as much as you can. This will make faster the extraction process.
  • The extraction process is very simple. Just select your low and high resolution meshes.
  • Set the vector space to Absolute if you asset is a static element, like props or environments.
  • Set the vector space to Relative if your asset will be deformed. Like characters.
  • Always use 32 bit images.
  • As I said export the maps using EXR 32 bits.
  • Before moving to Modo or any other 3D package, check your maps in Nuke.
  • Once in Modo, select your asset and go to the geometry options.
  • Check Linear UVs and set the render subdivision level.
  • Assign a new shader to your asset.
  • Add a new texture layer with your vector displacement map.
  • Set it up ass Displacement Effect.
  • Set the low and high value to 0 and 100.
  • You will see a displacement preview in viewport.
  • Set the gamma to 1.0 Remember that 32bit images shouldn’t be gamma corrected using Linear Workflow.
  • In the shader options set the Displacement Distance to 1m this should give you the same result than Mudbox.
  • In the render options you can control the displacement rate, which is your displacement quality more or less.
  • 1.0 is fine, play with that. Lower values will give you sharper results but will need more time to render.
  • Finally render a quick test to see if everything looks as expected.

Zbrush displacement in Modo by Xuan Prada

Another of those steps that I need to do when I’m working on any kind of vfx project and I consider “a must”.
This is how I set up my Zbrush displacements in Modo.

  • Once you have finished your sculpting work in Zbrush, with all the layers activated go to the lowest subdivision level.
  • Go to the morph target panel, click on StoreMT and import your base geometry. Omit this step if you started your model in Zbrush.
  • Once the morph targer is created, you will se it in viewport. Go back to your sculpted mesh by clicking on the switch button.
  • Export all the displacement maps using the multi map exporter. I would recommend you to use always 32bit maps.
  • Check my settings to export the maps. The most important parameters are scale and intensity. Scale should be 1 and intensity will be calculated automatically.
  • Check the maps in Nuke and use the roto paint tool to fix small issues.
  • Once in Modo, import your original asset. Select your asset in the item list and check linear uvs and set the amount of subdivisions that you want to use.
  • Assign a new shader to your asset, add the displacement texture as texture layer and set the effect as displacement.
  • Low value and high value should be set to 0 and 100.
  • In the gamma texture options, set the value to 1.0
  • We are working in a linear workflow, which means that scalar textures don’t need to be gamma corrected.
  • In the shader options, go to the surface normal options and use 1m as value for the displacement distance. If you are using 32bit displacements this value should be the standard.
  • Finally in the render options, play with the displacement rate to increase the quality of your displacement maps.
  • 0.5 to 1 are welcome. Lower values are great but take more time to render, so be careful.
  • Render a displacement checker to see if everything works fine.

Multi UDIM workflow in Modo by Xuan Prada

You know I’m migrating to Modo.
Multi UDIM workflow is on my daily basis tasks, so this is how I do the setup.

  • First of all, check textures and UDIMs in Mari and export all the textures.
  • Check the asset and UVs in Modo.
  • Load all your textures in the Modo’s image manager.
  • Create a new material for the asset.
  • Add all the UDIM textures as image layers for each required channel.
  • In the texture locator for each texture change the horizontal repeat and vertical repeat to reset. And change the UV offset. It works with negative values (not like Softimage or Maya).
  • That’s it. Make a render check to see if everything works fine.

Zbrush insufficent memory error! by Xuan Prada

You have probably experienced this error a few times already, haven’t you?
It is quite common specially when you are working with huge assets.

It happened to me last week a lot of times when working with a 40 UDIM asset and trying to export a 32 bit displacement maps.
My machine couldn’t handle it and Zbrush started to giving error saying “Insufficent memory error”.

If this happens to you and don’t know how to extract your displacement maps out of Zbrush, don’t worry, this small trick could help you.

  • Execute Zbrush using your root account in Mac or Administrador account in Windows.
  • In Windows just right click on the Zbrush icon and select “run as administrator”.
  • In Mac start a terminar and logging as root.
  • Then execute Zbrush.
  • Then in Zbrush go to Preferences -> Mem and increase the Compact Memory.
  • That’s it. It should work now.
  • Unfortunately this trick only worked for me with simple displacement, but it didn’t work with vector displacement :(

Zbrush to Maya and Vray 2.0 by Xuan Prada

I know how tricky can be sometimes to make your Zbrush displacements look great outside Zbrush.
Maya, Softimage, Vray, Renderman or Arnold, just to name a few treat Zbrush displacements in a different way.
Let me explain to you my way to export displacement from Zbrush to Maya and Vray 2.0

- First of all, if you are working with a final asset you will have to export your displacement using your base geometry imported in Zbrush. If you did the scult from scratch in Zbrush you may want to export your lowest subdivision mesh, create a good uv mapping and re-project your sculpted detail in that mesh.
If this is the case, check this.

  • Go to the lowest subdivision level.
  • Turn off all your layers.
  • Export as .obj
  • This is the object that you are about to render. If you had imported a base mesh before, you won’t need to export it again, it would be in your 3D application already.
  • Go back to the highest subdivision level.
  • Turn on all your layers.
  • Go down to the lowest subdivision level.
  • Store a new morph target and import the previous exported .obj or your original base mesh from your 3D application.
  • Your sculpted model will be substituted by the original mesh with no sculpt information.
  • Click on switch morph target to activate again your sculpted mesh.
  • You are ready to export the displacement maps, just check my settings below for 16 bits, 32 bits and vector displacement.
  • Finally to set-up your shaders and render settings for Zbrush displacements in Maya and Vray 2.0 check my previous post about it.

Arm texture breakdown by Xuan Prada

I did a simple and quick texture breakdown for an human arm.
These are the textures that I usually create when I need to texture digital doubles for films or any kind of humanoid character.

These are the most basic textures used.
Usually working on movies we need more additional textures depending on render engines, other pipeline tools or artistic decisions.
But as I said, take this example as a base or starting point for your work.

These are quick renders using a neutral lighting rig for look-dev.

Diffuse textures.

Overall textures.

Scatter textures.

Displacement textures.

Fine displacement textures.

Specular textures.

Projecting details in Zbrush by Xuan Prada

  • Export the lowest subdivision model.
  • Export the highest resolution model.
  • Work on the uv mapping using the lowest resolution model.
  • Go back to Zbrush and import the high resolution model.
  • Now import the low resolution model.
  • Select the high resolution model and go to Subtool -> Insert -> and select the low resolution model.
  • Once inserted you will see both models overlapped in the viewport.
  • You need to be complete sure that only the two models that you’re interest on are shown. All the additional stuff that you would have in your zbrush scene should be hidden.
  • Select the low resolution model and subdivide it as much as you need.
  • Store a Morph Target so you can always come back to the starting point in case that you need it in the near future. (and you will).
  • With the low model selected go to Subtool -> Project -> Project All
  • The most important parameters are Distance and PA Blur. Try to use low values as Distance and keep blur to 0. This is a trial and error process. Default distance value is a really good starting point.
  • Once the projecting process is done, check your model.
  • If you find big errors in the mesh try to use a Morph brush to reveal your original mesh. Remember that we stored a Morph Target while ago. Revealing the original model you can easily remove projection artifacts and sculpt quick fixes.
  • You are ready to export the displacement maps for this model. Just select the low resolution model and go back to the lowest subdivision level.
  • Check the screenshots to see the parameters that I’m using for 16bits 32bits and vector displacement.
  • Check the final displacement maps.

You can watch a detailed video tutorial with all these steps here, only available in Spanish.

Si quieres puede ver aquí un videotutorial con todos estos pasos y explicaciones más detalladas.

Import layer masks in Mari 2 by Xuan Prada

Lets say that importing masks in to Mari 2 created in other software, is something very common and all the texture artist out there do every single day.

I’m talking about painted masks in Photoshop or Nuke, or baked masks in Maya, Softimage or just cavities, occlusions and other important maps generated in Zbrush or Mudbox.

Using all these programs and more is something pretty normal in any VFX boutique nowdays.

When I started working with the first alpha version of Mari 2 I found a bit tricky the way to import maps generated in others software packages in to Mari as layer masks.

The way to paint layer masks in Mari seems to be pretty straightforward but as I said if you want to import a texture as layer mask you need to follow some steps.

I’m pretty sure that if you are a new Mari 2 user you can’t find how to do this before spend some time struggling your mind to figure out how to do this simple thing.

I spent probably more than 30 minutes to find this out and just realize that a lot of texture artist are having the same problems to find a way to do it.

So, follow these steps to import layer masks in to Mari and save your precious time :)

And of course, if you have another fastest way to do it, I’ll be glad to hear it.

  • Import you mask as new layer.
  • Add a reveal layer mask to the layer that you want to mask with your imported map.
  • Make a mask group.
  • Double click on the mask group icon to open the masks window.
  • Drag your imported mask layer to the list.
  • Remove the previous mask created by default.
  • Yo can invert the mask if needed.
  • Done, your imported mask is working perfectly.

Zbrush displacement in V-Ray for Maya by Xuan Prada

It is always a bit tricky to set up Zbrush displacements in the different render engines.
If you recently moved from Mental Ray or another engine to V-Ray for Maya, maybe you should know a few things about displacement maps extracted from Zbrush.

I wrote down here a simple example of my workflow dealing with that kind of maps and V-Ray.

  • First of all drag and drop your 16 bits displacement to the displacement channel inside the shading group attributes.
  • Maya will create a displacement node for you in the hypershade. Don’t worry to much about this node, you don’t need to change anything there.
  • Select your geometry and add a V-Ray extra attribute to control the subdivisions and displacement properties.
  • If you exported your displacement subdividing the UV’s, you should check that property in the V-Ray attributes.
  • Edge lenght and Max subdivs are the most important parameter. Play with them until reach nice results.
  • Displacement amount is the strength of your displacement and displacement shift sould be half negative than your displacement amount if you are using 16 bits textures.
  • If you are using 32 bits .exr textures, the displacement shift should be 0 (zero).
  • Select your 32 bits .exr file and add a V-Ray attribute called allow negative colors.
  • Render and check that your displacement is looking good.
  • I’ve been using these displacement maps. 16 bits and 32 bits.

Texturing for VFX film projects. Case study by Xuan Prada

These are the key points of an introduction lecture which I gave about texturing for VFX film projects.
We used different assets on the class but this is the only one which is not copyrighted and I can show here.
I created this asset specifically for this course.

Summary

- Check the model.
- Render a checker scene.
- Decide about the quality needed for the textures. Is it a hero asset?
- UV mapping.
- Organization methods.
- How many UDIM’s?
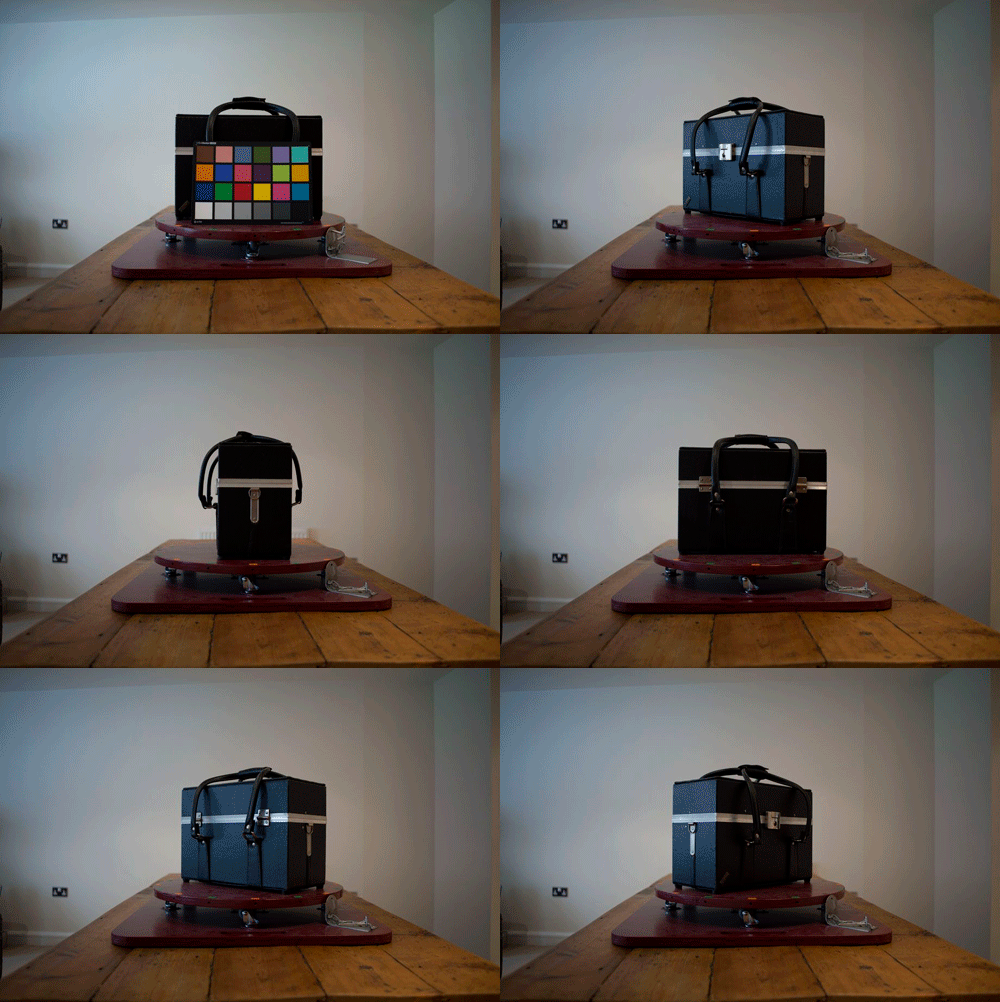
- Photo Shoot.
- What kind of lighting do I need?
- Accessories. (Color checkers, tripod, polarized filters, angular base, etc).
- Bakes. (dirt maps, dust maps, UVs, etc).
- Grading reference images. Create presets.
- Clean reference images for projections.
- Create cameras and guides in Maya/Softimage for projections.
- Adapt graded and cleaned reference images for projection guides.
- Project in 3D software or Mari. (Mari should be faster).
- Work on the projections inside Mari. (We can use Photoshop, Mari or both of them. Even Nuke).
- Create  a 16 bits sRGB colour textures.
- Test colour channel in the light rig.
- Create a 16 bits gray scale specular textures.
- Create a 16 bits gray scale bump textures.
- Create a 16 bits gray scale displacement textures.
- Create a 8 bits gray scale ISO textures.
- Look-Dev blocking.
- Import the light rig.
- Create a basic pass.
- Checker render (matte).
- Checker render (reflective).
- Create clusters.
- Block materials.
- Look-Dev primary.
- Set up diffuse.
- Set up specular and reflections.
- Balance materials.
- Look-Dev secondary.
- Set up bump.
- Set up displacement.
- Rebalance materials.
- Set up ISO’s.
- Look-Dev refinement.
- Rebalance materials if needed.
- Create material libraries.
- Render turntables.