Quick overview of the lightin tool "Lighter" created by Anton Grabovskiy for Houdini Solaris.
Check Anton Github here: https://github.com/grabanton/lighter
Please consider subscribing to my Patreon so I can keep making professional VFX training. Thanks.
lighting
Mix 03 /
Hello patrons,
This month I have another mix video for you. In this case I'm talking about two different ways of using the camera frustum to optimize your scenes. The first method is using the camera frustum to control the amount of subdivisions, a very common practice when dealing with large terrains that need a lot of displacement detail. We will use Houdini and Arnold, but this technique can be used in any DCC that supports Arnold. Other renderers have similar features.
The second method will use the camera frustum to blast parts of the scene not seeing by the camera. This is a tool that we will build in Houdini and can be used with any render engine.
Then we will move to another important topic in VFX, motion blur. I will show you how to use it properly to achieve photo realism. Motion blur should be taken very siriously, specially by lighters and FX TD's.
All the information on my Patreon.
Thanks!
Xuan.
Real time rendering for vfx, episode 04 /
Happy New Year!
Real time rendering for vfx episode 04 is here!
This is a long one, around 4 hours split in two different videos, both of them available already for you.
In these two videos I cover a lot of things related with lighting and rendering in Unreal. We will cover all the rendering methods, rasterization, raytracing, hybrid rendering and path tracing.
Some of the topics covered in this video are:
- Rendering methods in Unreal.
- Lightmass.
- Type of lights.
- Volumetric lighting.
- Modulate lighting.
- Global illumination.
- Mesh lights.
- Reflection methods.
- Post processing volumes.
- Particles lighting.
- Blueprints for lighting.
- Light function.
- Core components of a lighting scene.
- Neutral lighting conditions.
- Rasterization.
- Raytracing.
- Hybrid methdos.
- Path tracing.
All the info on my Patreon.
Simple spatial lighting /
Hello patrons,
I'm about to release my new video "Simple spatial lighting". Here is a quick summary of everything we will be covering. The length of this video is about 3 hours.
- Differences between HDRIs and spatial lighting.
- Simple vs complex workflows for spatial lighting.
- Handling ACES in Nuke, Mari and Houdini.
- Dealing with spherical projections.
- Treating HDRIs and practical lights.
- Image based modelling.
- Baking textures in Arnold/Maya.
- Simple look-dev in Houdini/RenderMan.
- Spatial lighting setup in Houdini/RenderMan.
- Slap comp in Nuke.
Thanks,
Xuan.
Head over my Patreon site to access this video and many more.
Arnold interoperability /
In this video I will guide you trough arnold operators in both Maya and Houdni to show you advanced methods for creating looks, and potentially anything arnold related. Working with arnold operators can be very beneficial in your visual effect pipeline, among other things you are going to be able to transfer "for free" pretty much anything from one 3D package to another, in this case from Maya to Houdini and vice-versa.
These days it is very common to work in a traditional 3D package like Maya while creating assets and then moving to a scene assembler like Houdini or Katana to do shots. With this workflow you are going to be able to do so in a very clean, tidy and efficient way.
On top of that, I'm going to show you how to create look files that can be easily exported to use in lighting shots, independently in Maya or Houdini. You also are going to be able to override looks, versioning looks in Shotgun and many more things.
This is a two plus hours video tutorial posted on my Patreon feed.
Thanks a lot for your support.
Xuan.
Cryptomatte in Katana and Arnold /
This post is mainly for my Patreon supporters. Some of them are having issues while setting up cryptomatte AOVs. This is how you do it.
Create a material node.
Add an AOVs shader -> cryptomatte.
If you are using the Arnold AOVs supertool, add all the cryptomatte AOVs that you need.
In the arnold global settings add the cryptomatte shader to the AOV shaders.
If you are not using the Arnold AOVs supertool.
Create an arnold output channel define node.
Set it to be crypto_material.
Type RGBA.
Add a render output define node.
Set the channel to crypto_material.
Repeat the same steps to create crypto_object and crypto_asset.
Katana Fastrack, episode 07 /
Hello patrons,
Episode 07 of Katana Fastrack is already available.
In this episode we will work on the second and latest lighting shot of this course, a live action shot where we have to integrate some CG elements, in this case our very own Ant Man falling on the ground.
We will learn a few things like:
- How to quickly capture HDRIs on-set and lighting references.
- How to technical grade footage and HDRIs to live under the same context.
- How to approach live action shots in Katana.
- How to slap comp CG renders on top of a plate for validation.
More information on my Patron site.
Thank you very much for your support!
Xuan.
Lighting a full CG shot in Houdini, part 02 /
Hello patrons,
I just finished the second video for Lighting a full CG shot in Houdini, if you are a patron you will find it in the next private post. This is the content that we will go through in the video for almost three hours.
- Introduction to ACES in VFX. We will talk about the basics of ACES, why it's important for your productions, how to set it up in Houdini, Arnold and Nuke.
- CG lights. I will show you how we usually deal with CG lightings in relationship with principal photography. We will talk about the most common lights used while lighting a CG shot and the purpose of each of them. A very quick introduction to cinematography for VFX.
- Finally, we will jump into Houdini to create a master lighting template that you would be able to re-use in your shots. We will establish a tidy structure that will enable you to work straight away in Houdini. We will create smart bundles to setup automatically your render passes, and finally we will see how to use operators, probably the most powerful render feature ever!
Here the link to the episode.
Thanks for your support!
Xuan.
Render mask in HtoA /
This is how to setup a render mask, or render patch, or whatever you want to call it, in Houdini using Arnold.
Render patches are generally used when a high cost render needs a fix that only affects to a small portion of the frame, or when most of the frame is going to be covered by a foreground plate.
In these scenarios there is no need to waste render time and render the whole frame, but just what is needed to finalize the shot.
This is the scene that I’m going to use for this example. Let’s pretend that we have already render 4k full range of this shot. All of the sudden we need to make some changes on the rubber toy screen left.
The best way to create a render mask is using Nuke. You can use an old render as template to make sure everything you need in the frame is covered by the mask. Rotopaint nodes are very useful specially if you need to animate your mask.
Create a camera shader and connect the render mask to its filter map.
Connect the shader to the camera shader input of the camera, in the Arnold tab.
If you render now, only the mask area will be rendered, saving us a lot of render time.
Huge limitation, that I don’t know how to fix and I’m hoping for someone to throw some light on this topic. If you are rendering with overscan, this won’t work nicely, let me show you why.
I’m rendering with a 120 pixels overscan, I know is generally speaking a lot, but I just want to illustrate this example very clearly.
Now if you render the same overscan with the render mask applied, you will get a black border around the render. Below is the render patch comped over the full frame render.
I’m pretty sure the issue is related to the wrap options of the render mask. By changing the wrapping mode you will get away of this issue in some shots, but in an example like the one on this post, there is no fix playing with the wrapping modes.
Any ideas?
You can definitely use the camera crop options and it will work perfectly fine, no issues at all. It is not as flexible as using your own textures, but it will do in most cases.
Lighting a full cg shot in Houdini, part 01 /
Part 01 of "Lighting a full cg shot in Houdini" is out.
In this first episode I go through everything you need to convert Houdini into a powerful scene assembler, specially focused on look-dev. I will go through other assembly capabilities and lighting/render in future videos.
In this episode we will cover:
- How to organize and prepare assets in Maya to be used in Houdini for assembly and render
- Good uv workflows for vfx and animation productions
- How to assemble multiple assets in Houdini in a scene assembly fashion
- Quick look at speed texturing in Substance Painter
- How to create digital assets and presets in Houdini to re-use in your projects
- Look-dev workflow in Houdini and Arnold
All the information on my Patreon feed.
Thanks for your support,
Xuan.
Nuke IBL templates /
Hello,
I just finished recording about 3 hours of content going through a couple of my Nuke IBL templates. The first one is all about cleaning up and artifacts removal. You know, how to get rid of chunky tripods, removing people from set and what not. I will explain to you a couple of ways of dealing with these issues, both in 2D and in 3D using the powerful Nuke's 3D system.
In the second template, I will guide you through the neutralization process, that includes both linearization and white balance. Some people knows this process as technical grading. A very important step that usually lighting supervisors or sequence supervisor deal with before starting to light any VFX shot.
Footage, scripts and other material will be available to you if you are supporting one of the tiers with downloadable material.
Thanks again for your support! and if you like my Patreon feed, please help me to spread the word, I would love to get at least 50 patrons, we are not that far away!
All the info on my Patreon feed.
Katana, constraint lights to an alembic geometry /
One of the most common situations while lighting a shot is attaching a CG light in your scene assembler to an alemic cache exported from Maya. This is very simple to do in Katana, let’s have a look at it.
I’m using this simple animation of a car spining around.
In most cases you need an object within the alembic cache that has the animation baked into it. The usual approach is to use a locator. To do so, snap it onto one of the lights geometry of the car and parent constrain it to the master control of the car. Then bake the animation of the locator and export it with the rest of the alembic cache to Katana.
In Katana, create a gafferThree node but do not place any lights yet. It is better to do the constraints first, if not you might have to deal with offset issues later on.
Use a parentChildConstraint node indicating the gaffer node in the basePath and the locator of the car in the target.
Now place both headlights according with the model of the car. If you press play they should follow the animation of the car perfectly.

In case you forget to do the parentConstraint before adding lights to the gaffer, you might have to control the offset and compensate for it. To actually see the values you can add constraintResolve and a transformEdit to check the transformations.
IBL pack 02 /
Introduction to Gaffer 03 /
Introduction to Gaffer part 03, where I show you how to use references, AOVs, batch rendering, displacement maps, other useful tools.
Houdini as scene assembler part 02 /
In the previous post I showed you how to load alembic caches using the file node and then change the viewport visualization to bounding box. This is good enough if you are let's say look-deving a character. If you want to load a heavy alembic cache, like a very detailed city with a lot of buildings, or a huge spaceship, you might want to use a different approach.
Instead of using a file node, it is better to use the alembic node to load you assets, and then set the option Load As: alembic delayed load primitives, and display as bounding box. This isn't actually loading the geometry in memory and it will be way more efficient down the line.
In this post I'm just talking about shading assignment in Houdini.
The easiest and more simple way to assign shaders is by selecting the asset node in the /obj context and assign a shader in the render tab. Your Mantra shaders should be placed in the /mat context and your Arnold shaders in the /shop context as /mat is not fully supported yet.
In the /mat context you can just go and create a Mantra Principled Shader. For Arnold, it is better to create an arnold shader network and then any arnold shader inside connected to the surface input.
Houdini doesn't have an isolation mode for shading components like Maya (as far as I know) but you can drag and drop shaders and textures onto the viewport or IPR while look-deving. This only works in the /mat context (again, as far as I know).
Another way of assigning shaders is creating material nodes inside of the alembic node. This material nodes can be assigned to different parts of your asset using wildcards. To assign multiple materials you can create different tabs in the material node or you can just concatenate material nodes (which I prefer). This technique works with both Mantra and Arnold.
You will find yourself most of the time creating material networks (Mantra) or shop networks (arnold) containing all the shaders of your asset. In a lighting shot you will end up with different subnetworks for each asset on the shot.
This subnetworks of shaders can be place at the /obj level or inside of the alembics containing your assets.
Another clever way of assignment shaders is using the data tree -> object appearance. This only works at object level. If you want to go deeper in your alembic asset, you need to add first a node called packed edit. Then in the data tree you will have access to all the different parts of your asset.
There is another way of controlling looks in Houdini, and that is using the material style sheets. We will cover this tool in future posts.
Introduction to gaffer /
By gaffer hq: Gaffer is a free, open-source, node-based VFX application that enables look developers, lighters, and compositors to easily build, tweak, iterate, and render scenes. Built with flexibility in mind, Gaffer supports in-application scripting in Python and OSL, so VFX artists and technical directors can design shaders, automate processes, and build production workflows.
With hooks in both C++ and Python, Gaffer's readily extensible API provides both professional studios and enthusiasts with the tools to add their own custom modules, nodes, and UI.
The workhorse of the production pipeline at Image Engine Design Inc., Gaffer has been used to build award-winning VFX for shows such as Jurassic World: Fallen Kingdom, Lost in Space, Logan, and Game of Thrones.
Ricoh Theta for image acquisition in VFX /
This is a very quick overview of how I use my tiny Ricoh Theta for lighting acquisition in VFX. I always use one of my two traditional setups for capturing HDRI and bracketed textures but on top of that, I use a Theta as backup. Sometimes if I don't have enough room on-set I might only use a Theta, but this is not ideal.
There is no way to manually control this camera, shame! But using an iPhone app like Simple HDR at least you can do bracketing. Still can't control it, but it is something.
As always capturing any camera data, you will need a Macbeth chart.
For HDRI acquisition it is always extremely important to have good references for you lighting distribution, density, temperature, reflection and shadow. Spheres are a must.
For this particular exercise I'm using a Mini Manfrotto tripod to place my camera above 50cm from the ground aprox.
This is the equitectangular map that I got after merging 7 brackets generated automatically with the Theta. There are 2 major disadvantages if you compare this panorama with the ones you typically get using a traditional DSLR + fisheye setup.
- Poor resolution, artefacts and aberrations
- Poor dynamic range
I use HDR merge pro in Photoshop to merge my brackets. It is very fast and it actually works. But never use Photoshop to work with data images.
Once the panorama has been stitched, move to Nuke to neutralise it.
Start by neutralising the plate.
Linearization first, followed by white balance.
Copy the grading from the plate to the panorama.
Save the maps, go to Maya and create an IBL setup.
The dynamic range in the panorama is very low compared with what we would have if were using a traditional DSLR setup. This means that our key light is not going to work very well I'm afraid.
If we compare the CG against the plate, we can easily see that the sun is not working at all.
The best way to fix this issue at this point is going back to Nuke and remove the sun from the panorama. Then crop it and save it as a HDR texture to be mapped in a CG light.
Map the HDR texture to a area light in Maya and place it accordingly.
Now we should be able to match the key light much better.
Final render.
Quick and dirty free IBLs /
Some of my spare IBLs that I shot while ago using a Ricoh Theta. They contain around 12EV dynamic range. Resolution is not pretty good but it stills holds up for look-dev and lighting tasks.
Feel free to download the equirectangular .exrs here.
Please do not use in commercial projects.
Cafe in Barcelona.
Cafe in Barcelona render test.
Hobo hotel.
Hobo hotel render test.
Campus i12 green room.
Campus i12 green room render test.
Campus i12 class.
Campus i12 class render test.
Chiswick Gardens.
Chiswick Gardens render test.
Hard light / soft light / specular light / diffuse light /
These days we are lucky enough to apply the same photographic and cinematographic principles to our work as visual effects artists lighting shots. That's why we are always talking about cinematography and cinematic language. Today we are going to talk about some very common techniques in the cinematography world: hard light, soft light, specular light and diffuse light.
The main difference between hard light and soft light do not eradicate in the light itself but in the shadows. When the shadow is perfectly defined and opaque we talk about hard light. When the shadows are diffuse we called it soft lighting, the shadows will also be less opaque.
Is there any specific lighting source that creates hard or soft lighting? The answer is no. Any light can create hard or soft lighting depending on two factors.
- Size: Not only the size of the practical lighting source but also the size in relationship with the subject that is being illuminated.
- Distance: In relation to the subject and the placement of the lighting source.
Diffraction refers to various phenomena that occur when a wave encounters an obstacle or a slit. It is defined as the bending of light around the corners of an obstacle or aperture into the region of geometrical shadow of the obstacle.

When a light beam impacts on the surface of an object, if the size of the lighting source is similar to the size of the object, the light beam will go parallel and get slightly curved towards the interior.

If the size of the lighting source is smaller than the object or it is placed far away from it, the light beam won't bend creating very hard and defined shadows.
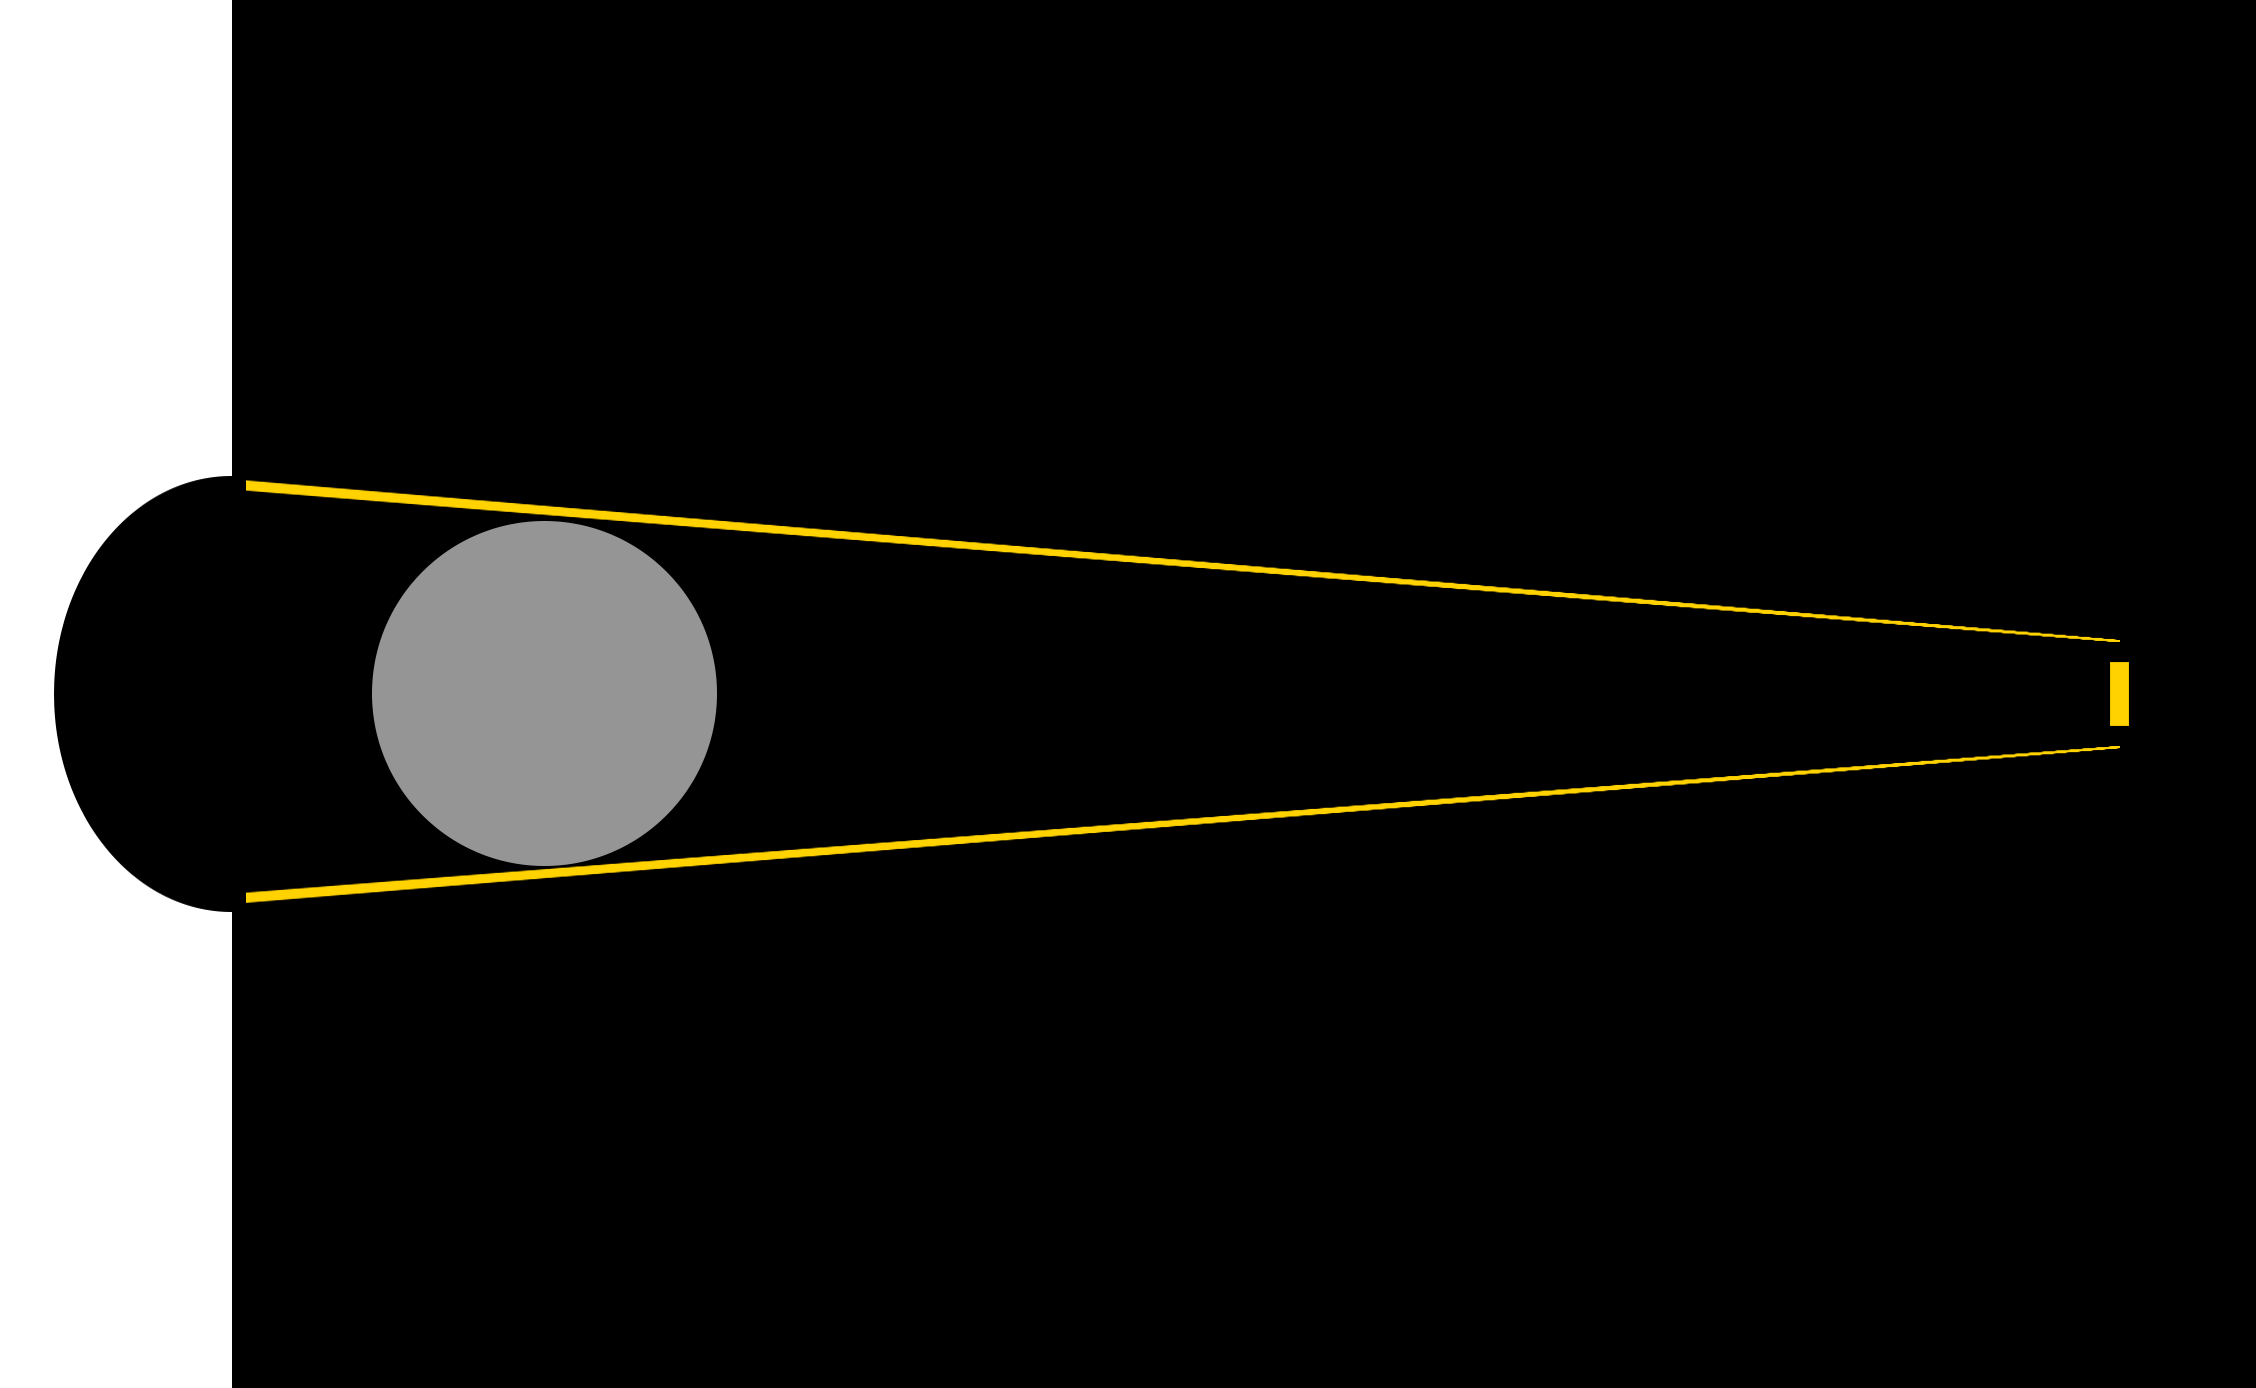
If the lighting source is bigger than the subject and it's placed near of it, the light beam will get curved a lot generating soft shadows.

If the lighting source is way bigger than the subject and it's place near of it, the light beam will be curved a lot, even they will get mixed at some point. Consequently the profile of the subject will not be represented in the shadows.

If a big lighting source is placed very far of the subject, its size will be altered in relation with the subject, and its behavior will be the same as a small lighting source, generating hard shadows. The most common example of this is the sun. It is very far but still generates hard lighting. Only on cloudy days the sun lights gets diffused by the clouds.
In two lines
- Soft light: Big lighting sources and or close to the subject.
- Hard light: Small lighting sources and or far from the subject.
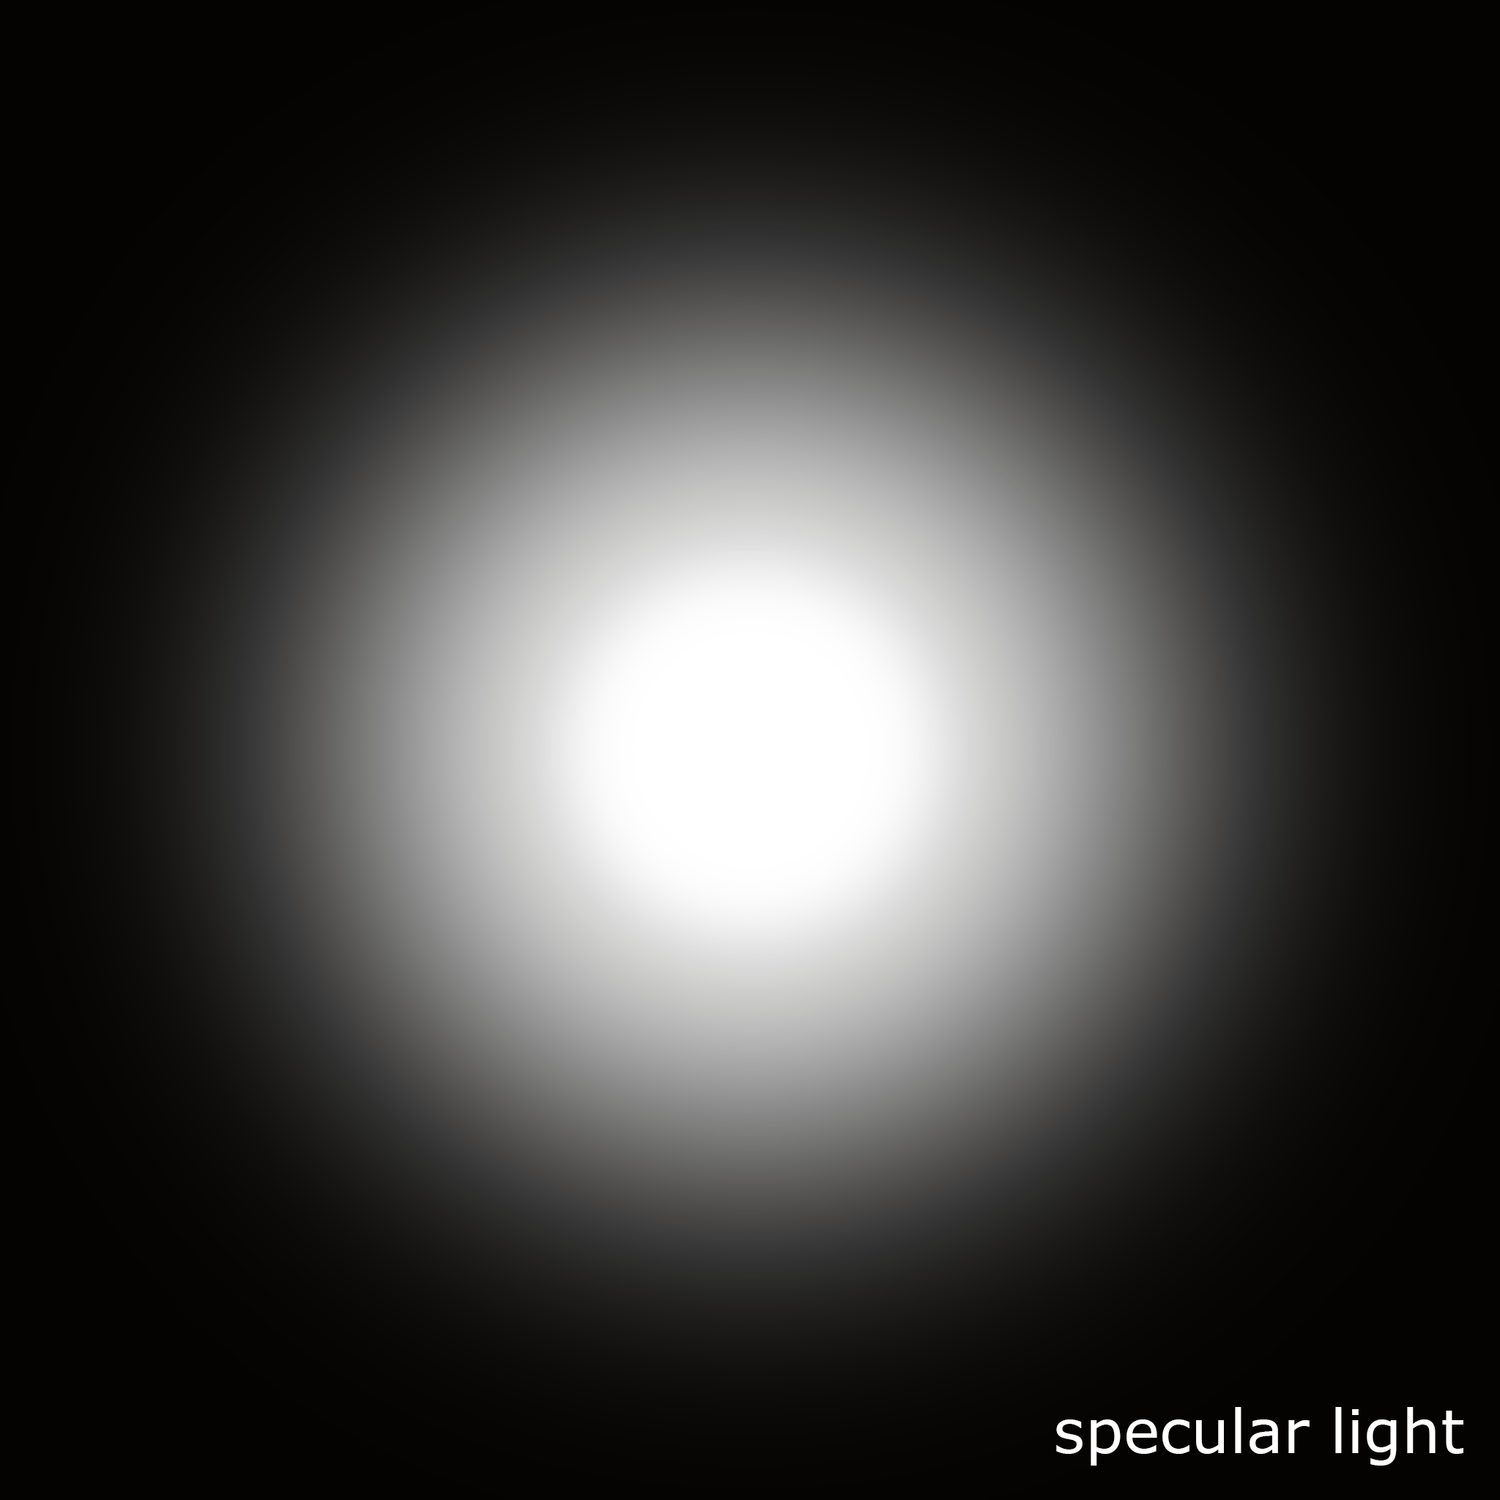
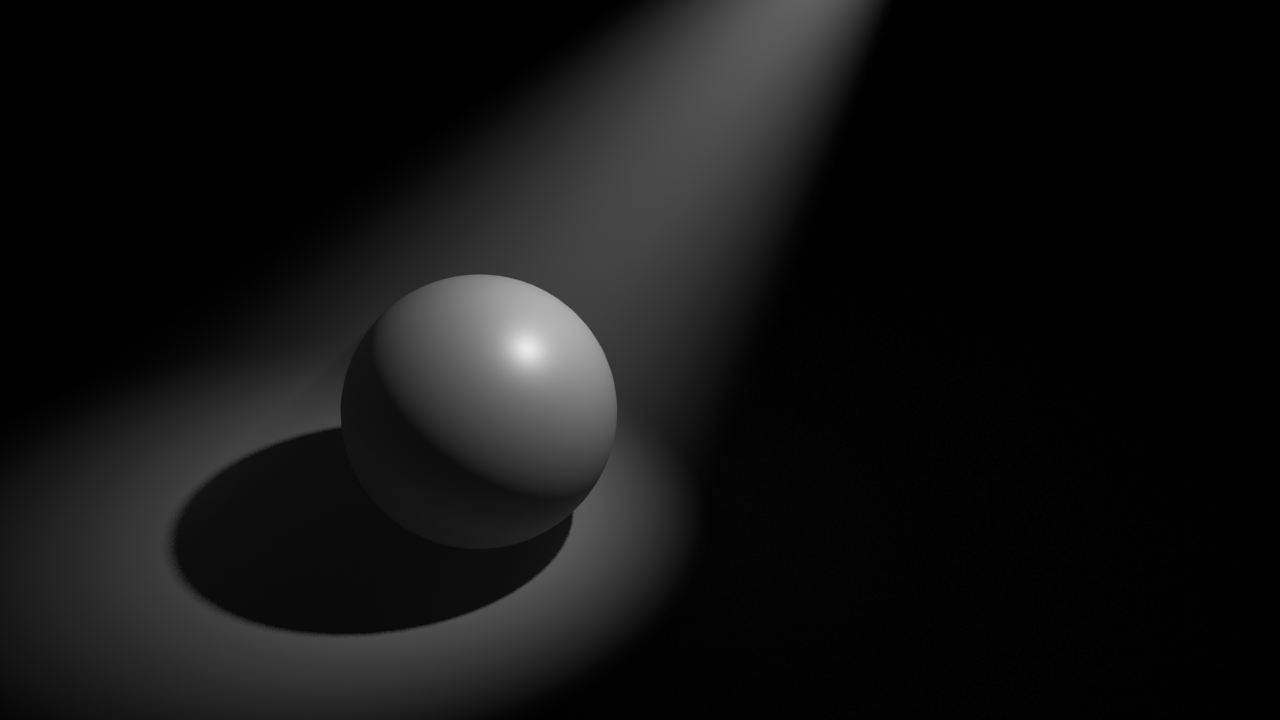
Specular light: Lighting source very powerful in the center that gradually loses energy toward its extremes. Like a traditional torch. It generates very exposed and bright areas in the subject. Like the lights used in photo calls and interviews.
Diffuse light: Lighting source with uniform energy all over its surface. The lighting tends to be more compensated when it hits the subject surface.
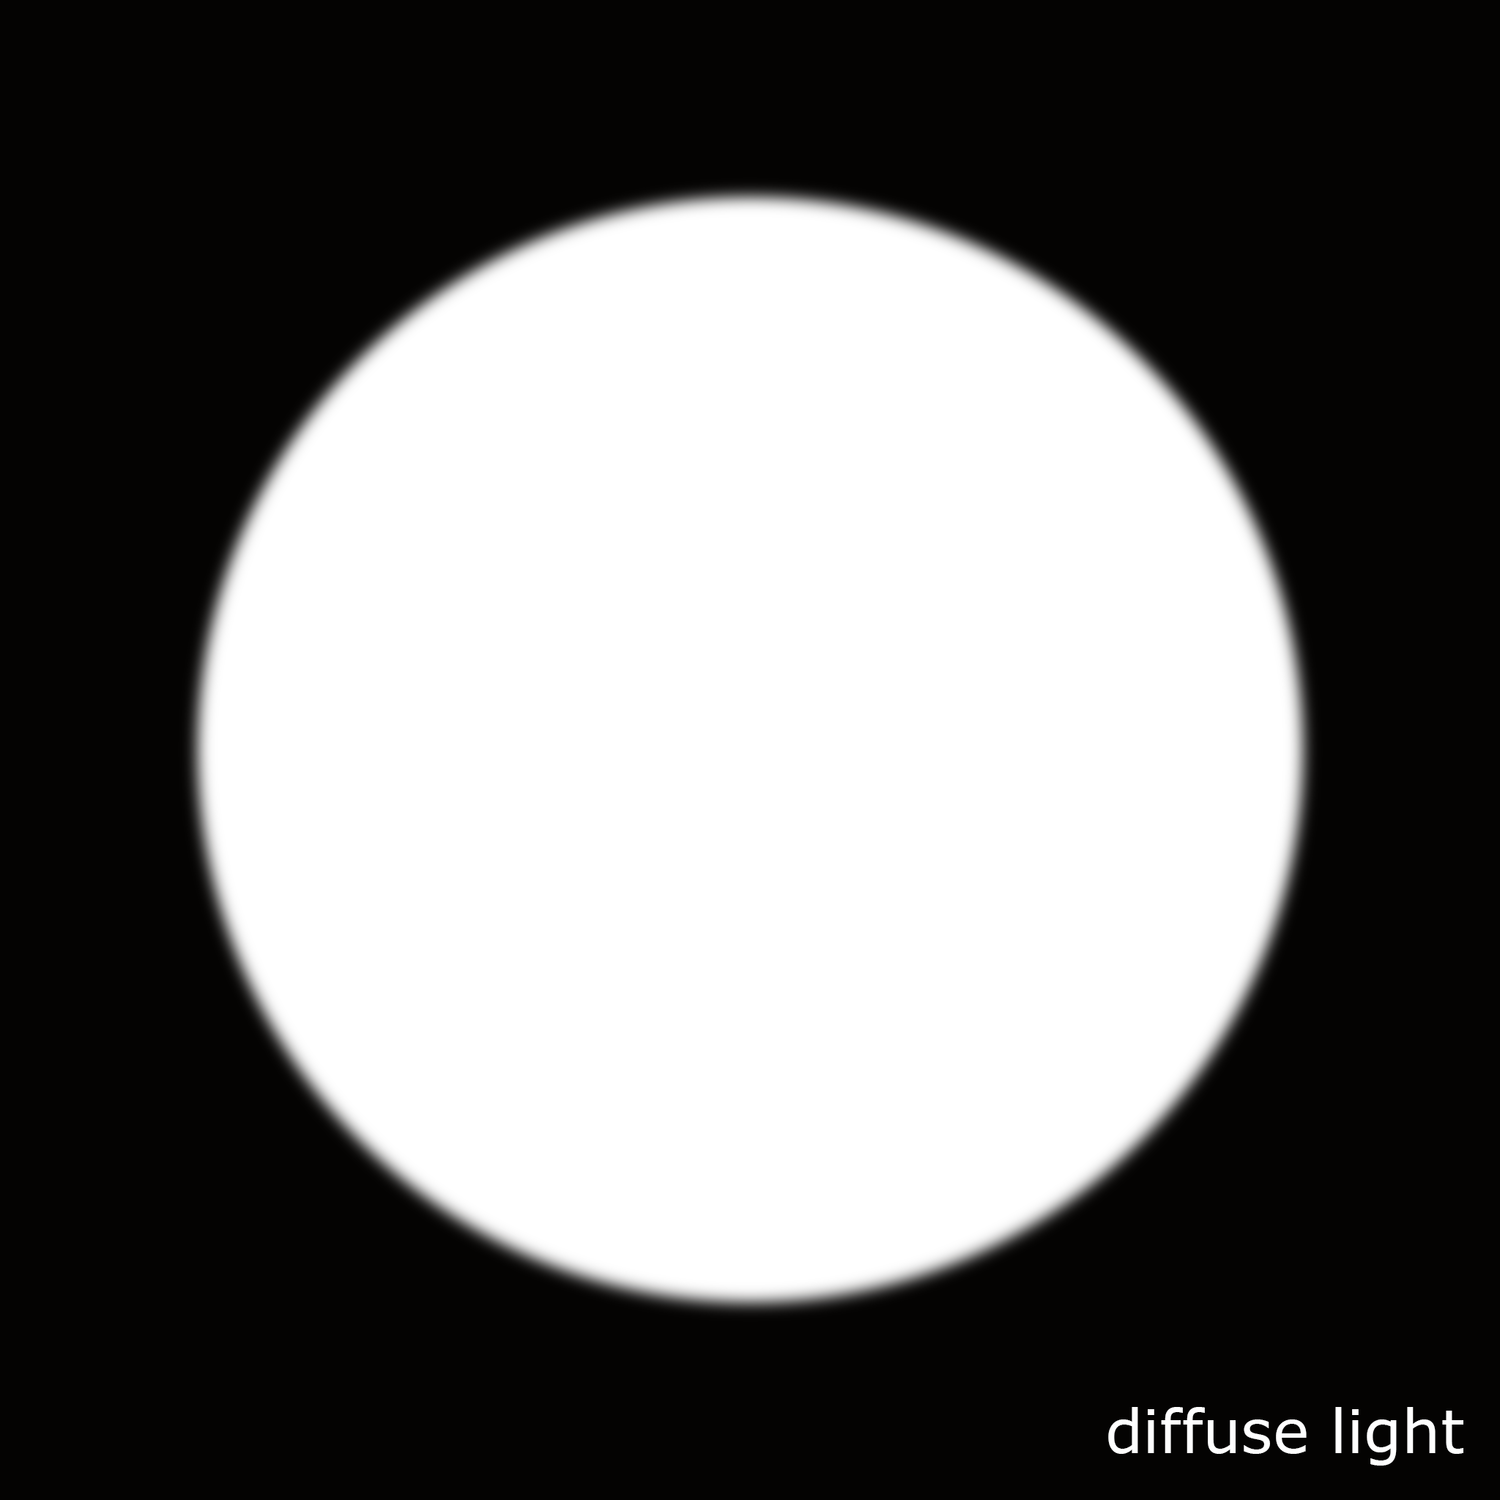
Diffuse light and soft light are not the same. When we talk about soft lighting we are talking about soft shadows. When we mention diffuse light we are talking about the distribution of the light, equally distributed along its surface.
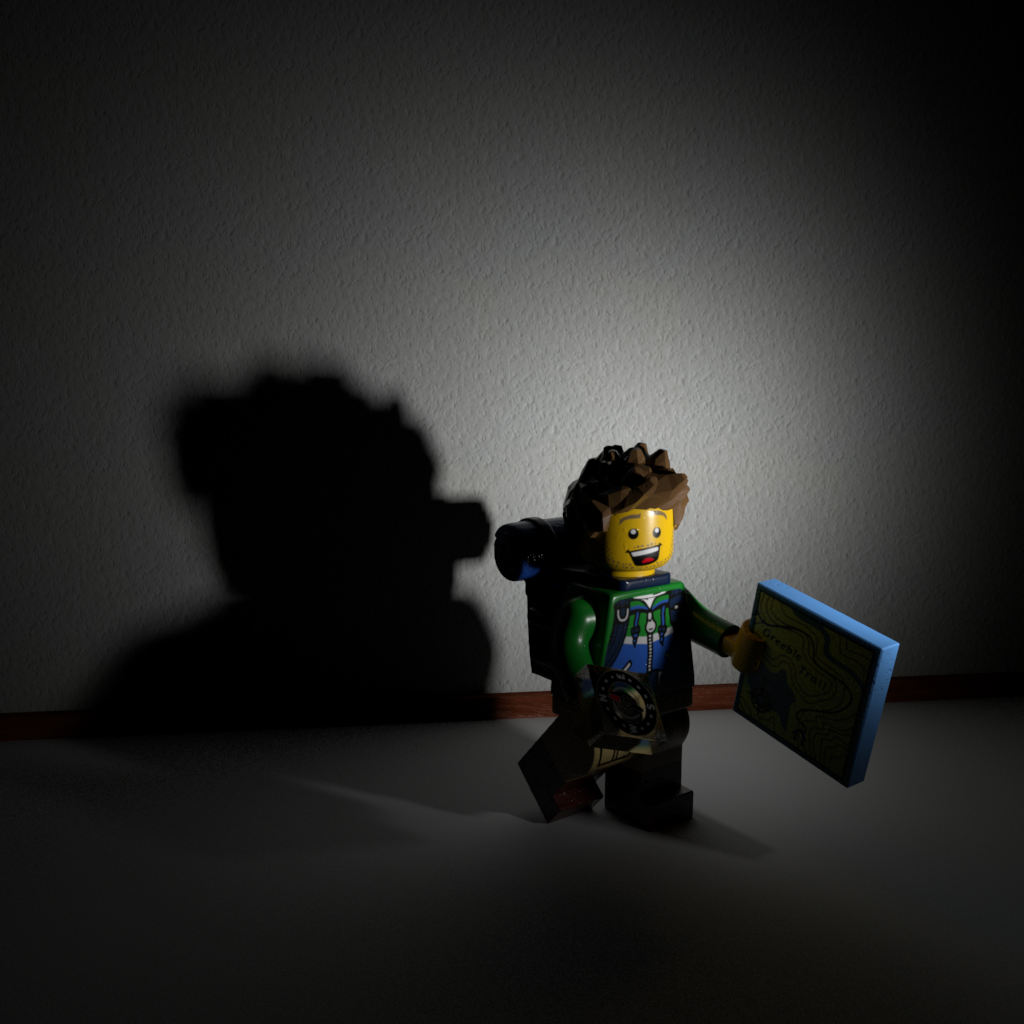
Some 3D samples with Legos.
- Here the character is being lit by a small lighting source, smaller than the character itself and placed far from the subject. We get hard light, hard shadows.

- Here we have a bigger lighting source, pretty much same size as the character and placed close to it. We get soft lighting, soft shadows.

- This is a big lighting source, much bigger than the subject. We now get extra soft lighting, losing the shape of the shadows.

- Now the character is being lit by the sun. The sun is a huge lighting source but being placed far far away from the subject it behaves like a small lighting source generating hard light.

- Finally there is another example of very hard light caused by the flash of the camera, another very powerful and concentrated point of light placed very close to the subject. You can get this in 3D reducing a lot the spread value of the light.
- Now a couple of images for specular and diffuse light.

RAW lighting and albedo AOVs in Arnold /
If you are new to Arnold you are probably looking for RAW lighting and albedo AOVs in the AOV editor. And yes you are right, they are not there. At least when using AiStandard shaders.
The easiest and fastest solution would be to use AlShaders, they include both, RAW lighting and albedo AOVs. But if you need to use AiStandard shaders, you will have to create your own AOVs quite easily).
- In this capture you can see available AOVs for RAW lighting and albedo for the AlShaders.
- If you are using AiStandard shaders you won't see those AOVs.
- If you still want/need to use AiStandard shaders, you will have to render your beauty pass with the standard AOVs and utility passes and you will have to create the albedo pass by hand. You can easily do this replacing AiStandard shaders by Surface shaders.
- if we have a look at them in Nuke they will look like these.
- If we divide the beauty pass by the albedo pass we will get the RAW lighting.
- We can now modify only the lighting without affecting the colour.
- We can also modify the colour component without modifying the lighting.
- In this case I'm color correcting and cloning some stuff in the color pass.
- With a multiply operation I can combine both elements again to obtain the beauty render.
- If I disable all the modification to both lighting and color, I should get exactly the same result as the original beauty pass.
- Finally I'm adding a ground using my shadow catcher information.